
The eZ Publish Style Editor provide a visual interface for styling your website. The visual editing interface is available from the Website Toolbar through the “css” tab:
When the visual editing interface is loaded for the first time a new site style is created. You can start editing using a default site style or by creating a new one.
In order to create a new site style choose the “Styles” tab from the eZ Publish Style Editor menu.

A new dialog box will be open where a new custom site style can be add. It is required to name the new site style thus this should be provided in the text input field. Next press “Create”.

In order to choose a new working site style, select one from the list and confirm by pressing the“Choose” button.
Adding styles to the available elements on page can be done using two methods:
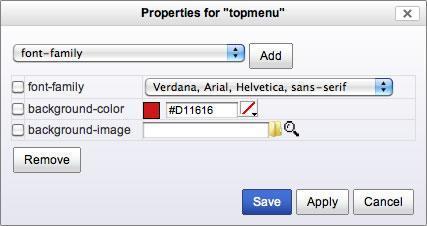
In order to add a new CSS property to the currently edited element, choose a property from the dropdown list and press the “Add” button.

The “Properties” window also contains buttons such as “Save”, which stores all your changes in the database, and “Apply”, which simply applies all styles without saving (like a preview).
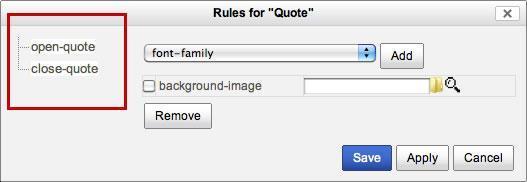
It is possible to enable the style editor to style more advanced design elements which usually require a complete set of CSS rules. These kind of elements can be grouped together. You can select them through the “Elements” tab located in the eZ Publish Style Editor menu.

The CSS rules for grouped elements are organized in a simple tree. To access the CSS properties for a group element simply click on the name in the list on left hand side.
Once you have finished working on the new site style, you can exit the CSS visual editor by pressing the “Exit” tab located in the top menu bar.
