XML block
Summary
Validates and stores multiple lines of formatted text.Properties
| Name | Internal name | Searchable | Information collector |
|---|---|---|---|
| XML block | ezxmltext | Yes. | No. |
Description
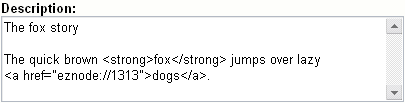
Although there are no immediate visual clues, this datatype behaves quite differently compared to the regular "Text block" datatype. In particular, it is capable of validating and storing multiple lines of formatted text instead of just plain text. The text in an XML block must be formatted using a collection of predefined tags. The tags control the actual HTML markup of the content. eZ Publish comes with a collection of tags that cover the needs of typical everyday tasks. In addition, it is also possible to extend the system by creating custom tags for special needs.
Please note that the "<" sign means the beginning of an XML tag. If you need to insert a less-than sign in the normal text flow (for example, "3<5"), you will have to use the corresponding XML entity as shown below:
3<5
By default, the datatype supports the following XML tags:
- Headings
- Bold text
- Italic text
- Unformatted text
- Lists
- Tables
- Hyperlinks
- Anchors
- Object embedding
- Custom tags
- Paragraphs
The following screenshot shows the class attribute edit interface for this datatype.

Class attribute edit interface for the "XML block" datatype.
Object attribute edit interface
The following screenshot shows the object attribute edit interface for this datatype.
Object attribute edit interface for the "XML block" datatype.
Raw output
The ".content" of an ezcontentobjectattribute object using this datatype returns an ezxmltext object.
Headings
Headings/titles can be added by making use of either the "h" or the "header" tag. The "level" parameter controls the size/level of the heading, it must be a number between 1 and 6. The optional "class" parameter allows the use of a desired CSS class. The optional "anchor_name" parameter makes it possible to add an anchor to the heading. Usage:
<h [level=""] [class=""] [anchor_name=""]>Example</h>
or
<header [level=""] [class=""] [anchor_name=""]>Example</header>
By default, the specified levels are increased by one. In other words, a level 1 header in the XML block will become a level 2 header (H2) in the resulting HTML. The reason for this is because the H1 tag is reserved for the name / main title of the content object. The headings inside the XML block will thus become subheadings of the main title. This behavior can be changed by creating an override template for the "/content/datatype/view/ezxmltags/header.tpl" template (it can not be controlled from within an configuration file).
Bold text
Bold text can be achieved by using one of the following tags: "b", "bold" or "strong". The optional "class" parameter allows the use of a desired CSS class. Usage:
<b [class=""]>Bold text.</b>
or
<bold [class=""]>Bold text.</bold>
or
<strong [class=""]>Bold text.</strong>
Italic text
Italic/emphasized text can be achieved by using one of the following tags: "i", "em" or "emphasize". The optional "class" parameter allows the use of a desired CSS class. Usage:
<i [class=""]>Emphasized text.</i>
or
<em [class=""]>Emphasized text.</em>
or
<emphasize [class=""]>Emphasized text.</emphasize>
Unformatted text
The "literal" tag can be used to output unformatted text, for example program source code, HTML code, XML content, etc. Everything that is inside an a literal block will be rendered in the same way (character by character) as it is within the literal tags (the text will be output using the HTML PRE tags). The optional "class" parameter allows the use of a desired CSS class. Usage:
<literal [class=""]>Example<\literal>
Please note that in the example above, the slash is in the wrong way within the tag that terminates the literal block. This was done in order to make the tag appear on the documentation page (since we're using literal tags to make code blocks). In other words, it should be terminated with a frontslash instead of a backslash.
Lists
It is possible to create lists in the same way as in HTML by making use of the "ol", "ul" and "li" tags. The lists can be nested. The optional "class" parameter allows the use of a desired CSS class. The following examples demonstrate the usage of ordered and unordered lists.
Ordered lists
<ol [class=""]>
    <li>Element 1</li>
    <li>Element 2</li>
    <li>Element 3</li>
</ol>
Unordered lists
<ul [class=""]>
    <li>Element 1</li>
    <li>Element 2</li>
    <li>Element 3</li>
</ul>
Tables
Tables can be created in the same way as in HTML using "table", "tr", "th" and "td" tags. The tables can be nested. Usage:
<table [class=""] [border=""] [width=""]>
...
</table>
The "class", "border" and "width" parameters are optional. The "class" parameter can be used to assign a desired CSS class. The "border" parameter can be used to set a border (number of pixels). The "width" parameter can be used to control the table width (either 0-100% or number of pixels). Table content should be written according to normal HTML table syntax with "tr", "th" and "td" tags, see below.
Table rows
Table rows can be created in the same way as in HTML:
<tr>Table row content goes here.</tr>
Table headers
Table headers can be created in the same way as in HTML:
<th [class=""] [width=""] [rowspan=""] [colspan=""]>Example.</th>
All parameters are optional. The "class" parameter can be used to set the desired CSS class. The "width" parameter can be used to set the width (either as percentage or number of pixels). The "rowspan" and "colspan" parameters are the same as in HTML.
Table data/cell
Table data/cells can be created in the same way as in HTML:
<td [class=""] [width=""] [rowspan=""] [colspan=""]>Example.</td>
All parameters are optional. The "class" parameter can be used to set the desired CSS class. The "width" parameter can be used to set the width (either as percentage or number of pixels). The "rowspan" and "colspan" parameters are the same as in HTML.
Hyperlinks
Hyperlinks can be inserted by making use of the "a" or the "link" tags. Usage:
<a href="" [target=""] [ class=""] [title=""] [id=""]>Example.</a>
or
<link href="" [target=""] [ class=""] [title=""] [id=""]>Example.</link>
The "href" parameter is required and it must be set to a valid address (either external or internal). The "target" parameter can be used to determine how the target URL should be opened (inside the existing/active browser window/tab or within a new window/tab). The "class" parameter can be used to specify a CSS class that should be used when the link is rendered. The "title" parameter can be used to specify a short title text (will be shown when the pointer is hovering over the link). The "id" parameter is for assigning unique identifiers.
Internal links
It is possible to create internal links (to other nodes and objects) by making use of the "eznode://" and the "ezobject://" notation. The internal links will be created dynamically based on the node/object ID numbers. In other words, if a node is moved, the link(s) will point to the new location(s) and thus they will not be broken.
Link to a node
A link to a node can be created either by specifying the target node's ID number or the node path. The following examples demonstrate how an internal link to node number 128 can be created.
<a href="eznode://128">Example.</a>
or
<link href="eznode://128">Example.</link>
The following examples demonstrate how an internal link to a node located at "products/computers/example" can be created.
<a href="eznode://products/computers/example">Example.</a>
or
<link href="eznode://products/computers/example">Example.</link>
Link to an object
The following examples demonstrate how an internal link to object number 1024 can be created.
<a href="ezobject://1024">Example.</a>
or
<link href="ezobject://1024">Example.</link>
When object linking is used, the destination address will be generated using the main node assignment of the target object.
Anchors
The "anchor" tag makes it possible to insert HTML anchors inside the XML block. The inserted anchors will work like standard HTML anchors. Usage:
<anchor name="" />
The "name" parameter must be set to a unique identifier for the anchor. Anchors can be reached by appending the hash character (#) followed directly by the name of the anchor that the browser should jump to. Example: http://www.example.com/hobbies#music
Object embedding
The "embed" tag makes it possible to insert an arbitrary content object directly in the XML block. It can for example be used to embed images. Usage:
<embed href="" [class=""] [view=""] [align=""] [target=""] [size=""] [id=""] />
With this tag, embedded objects are inserted as "block elements". Such an element always begins on a new line when it is displayed. It exists in its own virtual box and is always followed by a carriage return (like if someone hit the "Enter" key after inserting the object). This means that, for example, inserting an image using the "embed" tag will break the current paragraph. The "embed" tag is represented by block-level tags in the resulting XHTML code.
The "embed-inline" tag makes it possible to insert objects as inline elements. For example, this tag allows you to insert an image inside a text line. Usage:
<embed-inline href="" [class=""] [view=""] [align=""] [target=""] [size=""] [id=""] />
This tag is represented by inline tags in the resulting XHTML code. The templates that are used for rendering "embed-inline" tags must not contain block-level XHTML tags.
The following table reveals the list of parameters supported by the "embed" and "embed-inline" tags.
| Parameter | Description | Required |
|---|---|---|
| href |
The "href" parameter must be a valid link to either a node or an object using the same notation as for hyperlinks (for example "eznode://134", "eznode://path/to/some/node" and "ezobject://1024"). If the provided link is a link to a node, eZ Publish will use the object that is encapsulated by that node. In other words, in both cases it is the object that will be inserted (the node notation is just a wrapper). |
Yes. |
| class |
The "class" parameter makes it possible to specify a custom stylesheet that should be used. In the template, the specified stylesheet will be available in the $classification variable. |
No. |
| view |
The "view" parameter makes it possible to specify the view mode that should be used when the object is rendered (for example "full", "line" and so on). By default, the system uses the "embed" view mode when rendering objects that are inserted using the "embed" tag, while the "embed-inline" view mode is used together with "embed-inline" tags. |
No. |
| align |
The "align" parameter can be used to specify the positioning of the embedded object; possible values are "left", "center" and "right". |
No. |
| target |
The "target" parameter can be used to set the opening method (same browser tab/window or new browser tab/window) for the embedded item (for example "_self", "_blank", etc.). |
No. |
| size |
The "size" parameter can be used to set the image size that should be used when an image object is embedded (for example "small", "medium", "large", etc.). The available sizes are defined by image.ini. |
No. |
| id |
The "id" parameter makes it possible to assign a unique ID which will be the ID attribute in the resulting HTML. |
No. |
Custom tags
In addition to the default tags described above, the "XML block" datatype makes it possible to use custom tags. A custom tag can be used both as a block or an inline element. Custom tags must be specified using the "AvailableCustomTags[]" array in the [CustomTagSettings] block within an override for the "content.ini" configuration file. When the XML is rendered, the contents of a custom tag will be replaced by a custom template. The name of the template must be specified using the "name" parameter. Example of usage:
<custom name="template_name" [custom_parameter="value" [...] ]>
The quick brown fox jumps over the lazy dog.
</custom>
The custom tag in the example above will be replaced by a template called "template_name.tpl". This template must be located in the following directory within the current design: "/templates/content/datatype/view/ezxmltags/" (or one of the fallback designs). It is also possible to create an override template. The contents of the tag will be available in the "$content" variable within the inserted template. The custom parameters are optional. When used, a custom parameter will be available as a template variable with the same name as it was specified in the tag itself.
Paragraphs
Paragraphs can be added by making use of either the 'p' or the 'paragraph' tag.
The optional 'class' parameter allows the use of a desired CSS class. If you do not specify the class parameter, the paragraph will be displayed in a natural way (without tags) in the administration interface. To create a non-classified paragraph, you can simply press 'Enter' key twice.
Usage:
<p [class=""]>Example</p>
or
<paragraph [class=""]>Example</paragraph>
By default, the system will use 'p' tag in the resulting XHTML code. This behavior can be changed by creating an override template for the '/content/datatype/view/ezxmltags/paragraph.tpl'.
Balazs Halasy (21/02/2005 2:45 pm)
Svitlana Shatokhina (29/12/2006 2:04 pm)
Comments