Installing an eZ publish bundle on a Linux based system
This section describes how to deploy an eZ publish bundle on a Linux based system:
- Download the latest Linux compatible eZ publish bundle from http://ez.no/download/ez_publish. Look for "ezpublish-x.y.z-Linux-STABLE.i386.tar.gz" where "x.y.z" is the version number, for example "3.7.0".
- Unpack the bundle:
$ tar zxvf ezpublish-x.y.z-Linux-STABLE.i386.tar.gz - Become the root user:
$ su - Start the installation script:
# cd ezpublish-x.y.z-Linux-STABLE.i386
# ./install.sh
The following text explains the various dialog screens of the installation script.
Main menu

Step 1: Main menu
Select the "Install eZ publish 3" option and hit enter.
Previous installations
The installation script will automatically detect a previously installed bundle by checking a lock file. A previous installation must be removed. Use the "Uninstall eZ publish 3" option from the main menu, the installer will automatically remove the previous bundle. If a previous version was removed manually then the lock file may still be present. Remove the lock file manually by deleting the "/var/state/ezpublish/ezpublish.lock" file.
Confirmation

Step 2: Confirmation
A dialog will ask for a final confirmation. Choose "Yes". The installation script will then attempt to install all the software included in the bundle. Everything will be put in the "/opt/ezpublish" directory (except the lock file, which will be located at "/var/state/ezpublish/").
File extraction

Step 3: File extraction
The installation script will extract the files included in the bundle. This may take some time (a minute or two).
Network interface

Step 4: Network interface
A dialog will ask for the name of the primary network interface (most likely the Ethernet controller). The primary network interface is usually called "eth0". In case of doubt: bring up a shell and use the "ifconfig" command to figure out the name of the interface. It is possible to use the local loopback interface if no physical network interface is present. The name of the local loopback interface is "lo".
Web server port
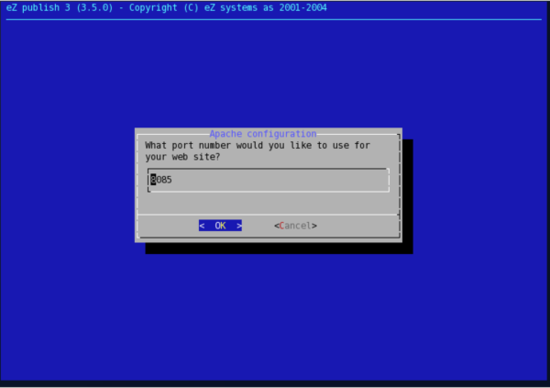
Step 5: Web server port
The installation script will ask for a TCP port number. The bundled web server (Apache) will communicate with the rest of the world through this port. The port must not be used by any other service running on the system. The default port for HTTP traffic is 80. If a web server is already using this port, then another port must be chosen (for example 8085).
Finish

Step 6: Summary
The final dialog will display information about the installation and how the eZ publish system can be reached using a web browser. The address will be something like "http://localhost" or "http://localhost:XXXX" where "XXXX" is the actual port number.
The web based setup wizard has to be run after the installation is finished (it will automatically start the first time the site is browsed). You should be able to follow the instructions on the screen. Refer to "The setup wizard" section for a complete step-by-step guide.
Balazs Halasy (13/01/2005 12:57 pm)
Svitlana Shatokhina (18/05/2006 8:37 am)
Comments
There are no comments.