Managing users
The "User accounts" tab allows you to manage the users and user groups that have been added to the system. In eZ Publish users and groups are managed as if they were on a file system. Users can be put into groups and groups can contain other groups.
The following screenshot shows the administration interface when you select the "User accounts" tab.
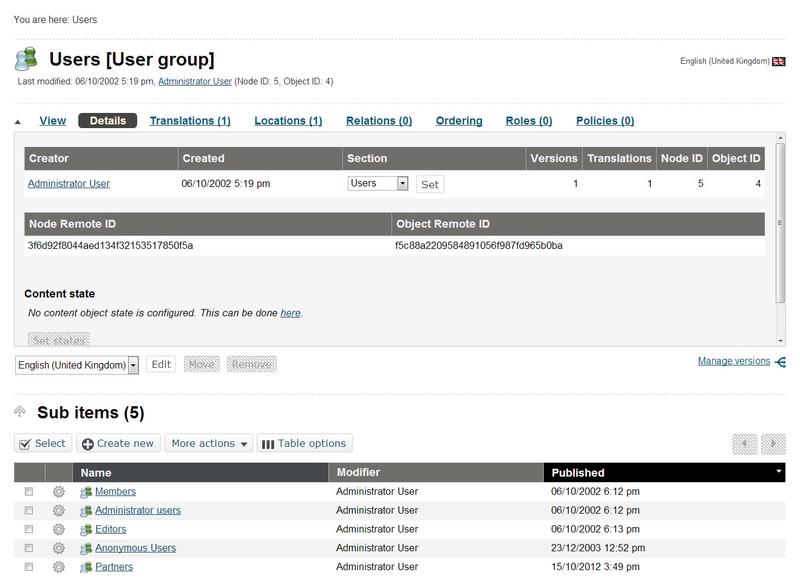
Users Account Tab
The following text explains how you can carry out daily tasks related to users on the system.
Adding a new user group
You can add new user groups in the same way as you add other content (articles, folders, etc.).
- Click the "User accounts" tab.
- Navigate the node tree until you find the location where you wish to add the new user group.
- Click "Create new", select "User group" in the drop-down list. Then you select the preferred language in the interface presented and click "OK". Next the object edit interface will be displayed.
- Fill in the necessary information (name and description) and click the "Send for publishing" button. The new user group will be saved inside the selected node. You can then go ahead and add new users and/or additional groups to this group.
Adding new user accounts
You can add new users in the same way as you add other content (articles, folders, etc.).
- Click the "User accounts" tab.
- Navigate the node tree until you find the location (typically a user group) where you wish to add the new user.
- Click "Create new", select "User" in the drop-down list. Then you select the preferred language in the interface presented and click "OK". The object edit interface will be displayed.
- Fill in the necessary information (E-mail, user name, password, etc.).
- Click the "Send for publishing" button - the new user will be saved inside the selected node.
Please note that a newly created user might not be able to log in and/or access information on the site. This is controlled by the roles that are assigned to the user or the group that the user is a member of. For example, a user put into the "Administrator Users" group will have unlimited access to all functions on the system. You can modify and assign roles using the interface that can be reached by clicking on the "Roles and policies" link located in the left menu below the tree structure.
Changing a user's details
You can change a user's E-mail, password, etc. by editing the node that represents the user. In other words, you can change the user's details in the same way as when you for example change the contents of a news article.
- Click the "User accounts" tab.
- Find the node that represents the user that you want to change by navigating the node tree.
- Edit the user in the same way as you would edit a folder, article, etc.
- Use the edit interface to make the changes and click the "Send for publishing" button.
Enabling and disabling users
A user account can be enabled or disabled. A disabled user account can not be used to log into the system. It is recommended to disable users instead of deleting them in order to keep existing relations. The following text explains how you can enable/disable a user account.
- Click the "User accounts" tab.
- Find the user account that you wish to enable/disable by navigating the node tree.
- Make sure that the user is displayed in the main area (it must be the object that is currently being viewed).
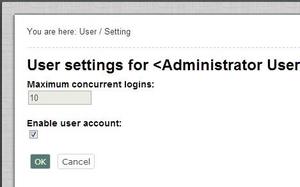
- In the preview window (click on the cogged wheel icon to select the Preview option), locate and click the "Configure user account settings" link. The system will bring up the "User settings" interface.
- Use the interface to enable/disable the user and click the "OK" button to finish. Please see the screenshot of the "User settings" below.
Unlocking user accounts
Note that the maximum number of failed log-in attempts are disabled by default. If you would like to setup the system with a specific number of failed attempts, please do so in the "site.ini" file. If the maximum number of failed login attempts is exceeded, a user account is automatically locked by the system. The user will not be allowed to log in until the account has been unlocked by another user with administrator privileges. The following text explains how user accounts can be unlocked.
- Click the "User accounts" tab.
- Find the user account that you wish to unlock by navigating the node tree.
- Make sure that the user is displayed in the main area (it must be the object that is currently being viewed).
- In the preview window (click on the cogged wheel icon to select the Preview option), locate and click the "Configure user account settings" link. The system will bring up the "User settings" interface.
- Click the "Reset" button. The number of failed log in attempts for this user will be reset to zero and the account will be unlocked. Click "OK".
User Settings
The "User settings" interface can also be accessed by copying <www.example.com>/user/setting/<user_id>" in the URL, where <user_id> is the ID number of the user account that needs to be unlocked.
Balazs Halasy (07/05/2010 9:03 am)
Andrea Melo (07/11/2012 3:03 pm)
Comments
There are no comments.