The "User accounts" tab
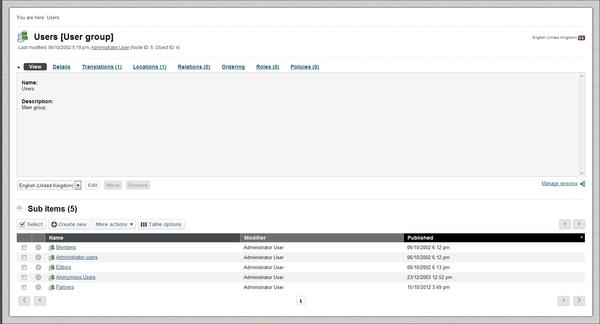
The "User accounts" tab makes it possible to browse and manage nodes that belong to the "Users" top level node. This part of the tree is reserved for organizing user accounts and user groups. In addition, the interface gives access to the built-in permission system, making it possible to manage roles and policies.
Note that the Sub items is set up with predefined columns. The user may add columns in "Table options" in the "Sub items" navigation area below.
The following screenshot shows the administration interface when the "User accounts" tab has been selected.
The User Account Window
Please note that in eZ Publish, user accounts and user groups are stored using nodes. In other words, when dealing with users and groups, the system works in the very same way as when dealing with other content like articles, folders, images, information pages, etc.
This part of the administration interface works in much the same way as the "Content structure" tab. It basically allows the user to organize and edit nodes. However, the "Create new" button in the left, upper corner of the "Sub items" list will only allow the creation of classes that belong to the "Users" class group.
Access
Unlike the "Content" tree, the contents of the "Users" branch can not be accessed directly from the outside. The entire branch belongs to a section to which the anonymous user does not have access by default (please refer to the documentation page dealing with "Sections" in the technical manual for more information). Although the default behavior can be changed, it is highly recommended to keep this branch protected because it contains sensitive information.
Concepts
The built-in permission system is based on the following elements:
- Users
- User groups
- Policies
- Roles
The following illustration shows the relations between the elements in the list above.

Users, groups, policies and roles.
Data model of relations between Role, Policies, User, User Group
A user defines a valid user account on the system. A user group consists of users and other user groups. A policy is a rule that grants access to content or a certain system function. For example, a policy may grant read access to a collection of nodes. A role is a named collection of policies. A role can be assigned to users and user groups.
Usage
In particular, there are two things that the "User accounts" tab allows you to do. First of all, it allows you to manage your users and user groups using the node tree. Secondly, it allows you to manage your roles and policies plus have the roles assigned to different users and/or user groups. User and user group management works in the very same way as when you're dealing with articles, information pages and so on. Role and policy management is done using a separate interface.
Managing user accounts and user groups
As pointed out earlier, users and groups are managed using nodes. This means that you can create, edit, delete, move, etc. your users and nodes in the same way as you would do when dealing with articles, folders, etc.
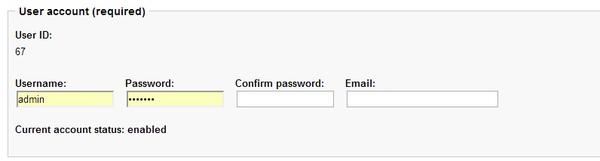
The built-in "User" class makes use of the "User account" datatype. This is a special data-type that plugs more deeply into the system. All objects that are using this datatype will automatically become valid users on the system. The "User account" datatype makes it possible to store a user name/password combination and an E-mail address. The following screenshot shows the edit interface for this datatype.
Adding User Account
Changing a user's password or E-mail address can be done by simply editing the user's node. Please note that it is not possible to change the user name once it has been initially entered into the system.
Enabling and disabling users
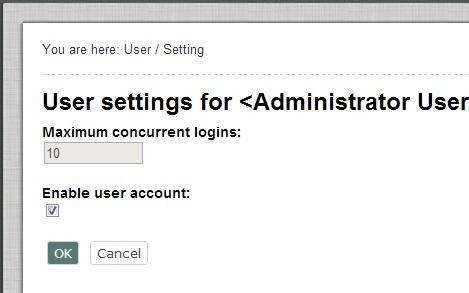
By default, all user accounts are enabled. When disabled, an account will continue to exist, but the user will not be able to log in until the account is re-enabled. The enable/disable feature can be accessed by following the "Configure user account settings" link which is displayed when a user is being viewed.

Configure User Account Link
The following screenshot shows the interface that will be displayed when the link is accessed.
User Settings
It is recommended to use this feature whenever a user is to be removed from the system. The reason is because most likely, the user has relations to some nodes. For example, the user might have posted forum messages, written news articles and so on. Removing the user account will result in a state with broken relations. If the user has posted forum messages, it will not be possible to see that it was actually that user who wrote those messages.
Removing a User Account
/!\ WARNING : delete a user account can lead to serious malfunctions.
Be cautious considering deleting a user account. In most cases, it is better to disable a user account than to delete a user account.
Disabling a user account prevents the user from logging in and does not remove the user's association with the user's content. Deleting the account destroys the link between the user and the user's content.
Unlocking user accounts
A user account can also be automatically locked by the system if the number of failed log-in attempts is exceeded (this is controlled by the "MaxNumberOfFailedLogin" setting located in the "[UserSettings]" section of the "settings/site.ini" configuration file or its override). Once the account is locked, the user will not be allowed to log in until his account is unlocked by another user with administrator privileges.
User groups
User groups may contain user accounts and other user groups. In other words, a user group is just a collection similar to the concept of directories that contain files and sub directories on a file system.
Additional windows
As in the "Content structure" and "Media" tabs, the horizontally aligned switches in the upper part of the main area control the visibility of the different windows. When the "User accounts" tab is selected, the system gives access to two additional windows called "Roles" and "Policies". When enabled, these windows will reveal detailed information about the roles and the policies that are valid for the user account or the user group that is being viewed.
The following screenshot shows the "Roles" window.

The Roles Window
In this case, two roles have been assigned to the user/group that is being viewed. The name of the role is "Anonymous" and "Member" and it has been assigned with no limitations. It is possible to directly edit the role by clicking on the edit icon(s). The following screenshot shows the "Policies" window.

The Policies Window
In this case, the group that is being viewed has access to several policies. All policies are defined in the "Anonymous" user group role. The policies apply for several modules and functions, and several limitations apply. For practical purposes the list of policies is sorted alphabetically.
Unactivated Users

This section allows the administrator to force the activation for users that haven't been activated, by mistake, or caused by any server failure, such as an failed confirmation email sending, for the case of being using the email confirmation feature, which is controlled by the RequireConfirmEmail legacy setting.The administrator can either activate or remove user accounts that are pending for email confirmation.
Balazs Halasy (07/05/2010 8:54 am)
Sarah Haïm-Lubczanski (25/02/2014 1:53 pm)
Comments
There are no comments.