Formatted text
An XML block (structured text) consists of various elements that are defined by the eZ Publish XML tags. The following elements are supported:
- Format and Headings
- Bold text
- Italic text
- Underline text
- Sub script
- Super script
- Ordered lists (numbered)
- Unordered lists (bullet list)
- List items
- Hyperlinks
- Anchors
- Embedded objects (images and objects)
- Custom tags
- Literal text
- Tables
- Table rows and columns
- Table header cells
- Table cells ((un)merge)
- Lines and paragraphs
Note that many of the items may include some of the other items.
The OE allows you to specify the properties of the elements (this can be done for all elements except for lines). Most of the elements can be classified. This means that you can assign some value to the "class" attribute of their XML tags.
Note that special characters can also be used. They can be inserted "as is" without the need of using XML tags. Also text alignment does not use XML tags.
The current element is determined by the text cursor position. The selected elements appear when you select a piece of the content. To perform an operation on the current or selected element you can use the OE toolbar and the context menu. In addition, tag names in the XML tag path allow you to access and modify the properties of the current or selected element.
Click on the desired link in order to see the more details about each topic:
Lines and paragraphs
In the OE text area you can create new lines and paragraphs. Paragraphs can be classified, but lines cannot.
Note that both lines and paragraphs are displayed in a natural way (without tags) when the Online Editor is disabled. For classified paragraphs the XML tag "paragraph" is displayed when the Editor is enabled.
The XHTML code the system generates when converting the contents of an XML block datatype into XHTML is controlled by the following templates:
- <eZ_Publish_root>/ezpublish_legacy/design/standard/templates/content/datatype/view/ezxmltags/line.tpl
- <eZ_Publish_root>/ezpublish_legacy/design/standard/templates/content/datatype/view/ezxmltags/paragraph.tpl
Creating a new line
Hold the "Shift" key down and press the "Enter" key. A new empty line will be created.
Creating a new paragraph
Position the cursor at a location where you wish to add a new text paragraph and press the "Enter" key. A new empty paragraph will be created.
Spacing content with lines and paragraphs
You cannot use multiple empty lines for spacing content: the system will automatically remove the extra lines when storing your drafts and publishing your objects. Empty lines for spacing content can be achieved via custom tags, CSS used when classifying elements, and in the templates.
By default, empty paragraphs cannot be used for spacing content either. However, if you specify
[paragraph]
AllowEmpty=true
in an override for the "content.ini" configuration file, the use of empty paragraphs for spacing content will be allowed.
Classified paragraphs
The OE allows you to set the "class" parameter for paragraphs. The following instructions reveal how this can be done.
- Access the properties of the target paragraph as described here.
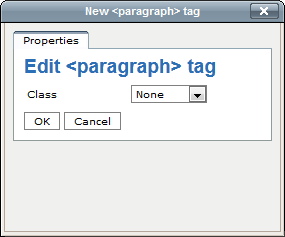
- Select the desired class from the drop-down list as shown below and click the "OK" button. Note that the different classes must be defined in an override for the "content.ini" configuration file.

Online Editor: choosing the class name for the paragraph.
The class name will be set and indicated in the status bar (see the screenshot below).

The OE status bar displays the class name of the current paragraph.
Refer to "The class parameter" section for more information about classes.
Block and inline elements
A block element always begins on a new line when displayed. It exists in its own virtual box and is always followed by a carriage return (like if someone hit the "Enter" key after typing in some text). There are 12 types of block elements:
- Headings
- Ordered lists
- Unordered lists
- List items
- Embedded objects (images and others)
- Literal text
- Tables
- Table rows
- Table header cells
- Table cells
- Paragraphs
- Block custom tags
An inline element becomes the part of other text in a natural way. There is no box around inline elements and it doesn't look like if someone hit the "Enter" key after typing it in. There are 6 types of inline elements:
- Bold text
- Italic text
- Hyperlinks
- Anchors
- Lines
- Inline custom tags
- Inline embedded objects (images and others)
Block elements are represented by block-level tags in the resulting XHTML code; inline elements are represented by inline tags. Because of this there are two main rules for block and inline elements.
| XHTML | eZ Publish XML (Online Editor) |
|---|---|
| Placing text or other inline tags directly within the "body" tag is not allowed. They should be surrounded by a block level tag. |
Text and/or inline elements are always encapsulated by a paragraph (you can see the tag "paragraph" in the OE status bar, but the paragraph tags are not shown in the simplified XML). Note that text or inline elements inside table cells are encapsulated by paragraphs both in eZ Publish XML and resulting XHTML. Text or inline elements inside block custom tags are also encapsulated by paragraphs. |
| Block-level tags may contain inline tags inside but not the other way around. For example, a paragraph tag cannot be placed inside a bold tag. |
Block elements may contain inline elements but not the other way around. For example, if you select two paragraphs and click the "Bold" button, the OE will create two bold elements (one inside each paragraph). |
Note that a single "p" tag inside a table cell will be omitted in the resulting XHTML code if you add the following line into the "[ezxhtml]" section of an override for the "<eZ_Publish_root>/ezpublish_legacy/settings/ezxml.ini" configuration file:
RenderParagraphInTableCells=disabled
Element properties
The Online Editor allows you to modify the properties/attributes of the different elements. The attributes generally correspond to the parameters of the element's XML tag. For example, if a tag supports some kind of a parameter, then you'll most likely be able to modify that parameter through the Online Editor. Note that lines and special characters do not have any properties.
To view/edit an element's properties, put the cursor somewhere inside it and then click on the corresponding XML tag name in the status bar.
The following example shows how to access the properties of a text paragraph:
- Put the cursor somewhere inside the target paragraph. Alternatively, you can also select the entire paragraph or a part of it.

A tag name displayed in the OE status bar is a textual link.
The "paragraph" tag will appear in the status bar (marked with red square in the screenshot). Click on it to access the properties of the current paragraph. - A dialog box will appear and allow you to view and edit the properties of the current/selected paragraph.
Online Editor: the properties dialog for a paragraph.
To learn more about the properties of a particular element, refer to the section that describes it.
The class parameter
Most of the elements can be classified meaning that you can assign some value to the "class" attribute of their XML tags. This allows you to tweak the appearance and/or behavior of the different elements. Elements of the same type can be classified in different ways. For example, if you want some of your paragraphs to look different from others, you can define custom stylesheets and use the "class" parameter as a style selector (to determine which CSS class that should be used).
The "class" parameter can be set for the following elements:
- Headings
- Bold text
- Italic text
- Numbered lists
- Bullet lists
- Embedded objects
- Hyperlinks
- Literals
- Tables
- Table headers
- Table cells
- Paragraphs
To set the "class" parameter for a particular element, you'll have to access the element's properties. Choose the necessary class from the drop-down list and click the "OK" button. If there are no available classes specified for the selected item then the drop-down list will be empty.
Available classes
Use the "AvailableClasses[]" array from within an override for the "content.ini" configuration file to specify the available classes for the different tags.
For example, the following lines will allow the "html" class to be selected for literal text.
[literal]
AvailableClasses[]=html
The following lines define "pRed", "pBlue" and "apple" classes for paragraphs.
[paragraph]
AvailableClasses[]=pRed
AvailableClasses[]=pBlue
AvailableClasses[]=apple
Using alternate/custom templates
The default templates in the directory "<eZ_Publish_root>/ezpublish_legacy/design/standard/templates/content/datatype/view/ezxmltags/" determine how the content of XML tags should be rendered.
Example
When the XML code is rendered, the system will replace the XML code
<emphasize>Emphasized text.</emphasize>
by the following XHTML code:
<i>Emphasized text.</i>
so that it will be displayed on the site as follows:
Emphasized text.
This behavior is dictated by the following instruction:
<i{section show=ne($classification|trim,'')} class="{$classification|wash}"{/section}>{$content}</i>
that is specified in the default template "emphasize.tpl" located in the "<eZ_Publish_root>/ezpublish_legacy/design/standard/templates/content/datatype/view/ezxmltags/" directory.
The templates are written using the eZ Publish template language. In the template, the tag contents is available in the "$content" variable.
All the XML tags can be fully customized by changing the templates.
If you need to specify custom rendering for your tags, you can use custom templates in your design directory. For example, you can create a template called "paragraph.tpl" inside the "templates/content/datatype/view/ezxmltags/" subdirectory of your design. The system will then use this template whenever it is about to render the contents of a paragraph. The value of the "class" parameter will be available in the $classification variable.
It is also possible to use the template override system. This approach allows you to trigger custom templates based on a set of conditions. For example, if some of your paragraphs are classified as "apple", you can create a new template called "apple_paragraph.tpl" in the "override/templates/" directory of your design. In order to trigger the new template, you'll have to make sure that the "override.ini.append.php" file that belongs to the siteaccess contains the following lines:
[apple_paragraph]
Source=content/datatype/view/ezxmltags/paragraph.tpl
MatchFile=apple_paragraph.tpl
Subdir=templates
Match[classification]=apple
After the caches are cleared, all paragraphs classified as "apple" will be rendered using your custom template. Other paragraphs using none or alternative classes will be rendered using the default paragraph template.
Appearance of classified elements on the site
It is possible to control how the different elements should look like on the site pages. In other words, it is possible to tweak the final look/output that will be seen when the site is being browsed by visitors. The following text explains how this can be done.
- Create a custom CSS file, for example "abc.css" inside the "stylesheets" directory of your design.
- Add some CSS code. The following example will set a blue background and center the text for the paragraphs of "apple" class:
p.apple
{
   background-color: blue;
   text-align: center;
}
In this example, CSS settings are specified for XHTML tag "p", not for XML tag "paragraph". Please note that it is impossible to specify CSS settings directly for original XML tags. To learn which XHTML tag that corresponds to a particular element please refer to the section that describes it (this is usually defined by templates). - Specify the custom CSS file using the "CSSFileList[]" array within an override for the "design.ini" configuration file:
CSSFileList[]=abc.css
The main template "pagelayout.tpl" will now use the custom CSS file "abc.css".
Please note that you can also specify the custom CSS file by including it directly in the pagelayout. To do this, add the following code after the already existing stylesheet-related lines in the head section:
<link rel="stylesheet" type="text/css" href={'stylesheets/abc.css'|ezdesign} />
Styling editor content
It is possible to customize the styling of the content inside the Online Editor. To set different styles, use the EditorCSSFileList setting in the [StylessheetSettings] of your design.ini file at extension/ezoe/settings. Here you can append your own css to be used for the editor content just like you could in the old editor. An example of how you can do this is shown here:
[StylesheetSettings]
EditorCSSFileList[]=my_custom_editor_styles.css
To customize the design of you popup dialogs adjust the EditorDialogCSSFileList setting similar to the way described above. The css file set here is loaded after the dialog.css file from the selected skin. An example is given here:
[StylesheetSettings]
EditorDialogCSSFileList[]=my_custom_editor_dialog_styles.cs
Read the information in your OE's design.ini configuration file for more information regarding customizing OE style.
Svitlana Shatokhina (08/12/2005 9:31 am)
Sarah Haïm-Lubczanski (10/06/2014 1:06 pm)
Comments
There are no comments.